
Use this page for the order timeline, not a definition of fabrication
The definition page explains what sheet metal fabrication means. This one explains what happens after you send drawings and why the calendar sometimes behaves like it has opinions.
This page has been separated from the basic definition guide so Google and buyers can see the job of this article clearly. The useful question here is not “can someone make metal parts?” It is: what should a buyer check before sending drawings, approving a quote or moving into production?
- Confirm when the lead-time clock starts: PO, deposit or drawing approval.
- Ask whether material is in stock before trusting the quoted date.
- Build buffer for outsourced finish and export freight.
- Request first article photos before approving batch production.
- Keep revision changes out of production unless the schedule is updated.
| 1 | Confirm when the lead-time clock starts: PO, deposit or drawing approval. |
| 2 | Ask whether material is in stock before trusting the quoted date. |
| 3 | Build buffer for outsourced finish and export freight. |
| 4 | Request first article photos before approving batch production. |
| 5 | Keep revision changes out of production unless the schedule is updated. |
If What Is Sheet Metal Fabrication? answers the definition question, this guide answers the buyer question: what actually happens after you send drawings, and where can things go wrong?
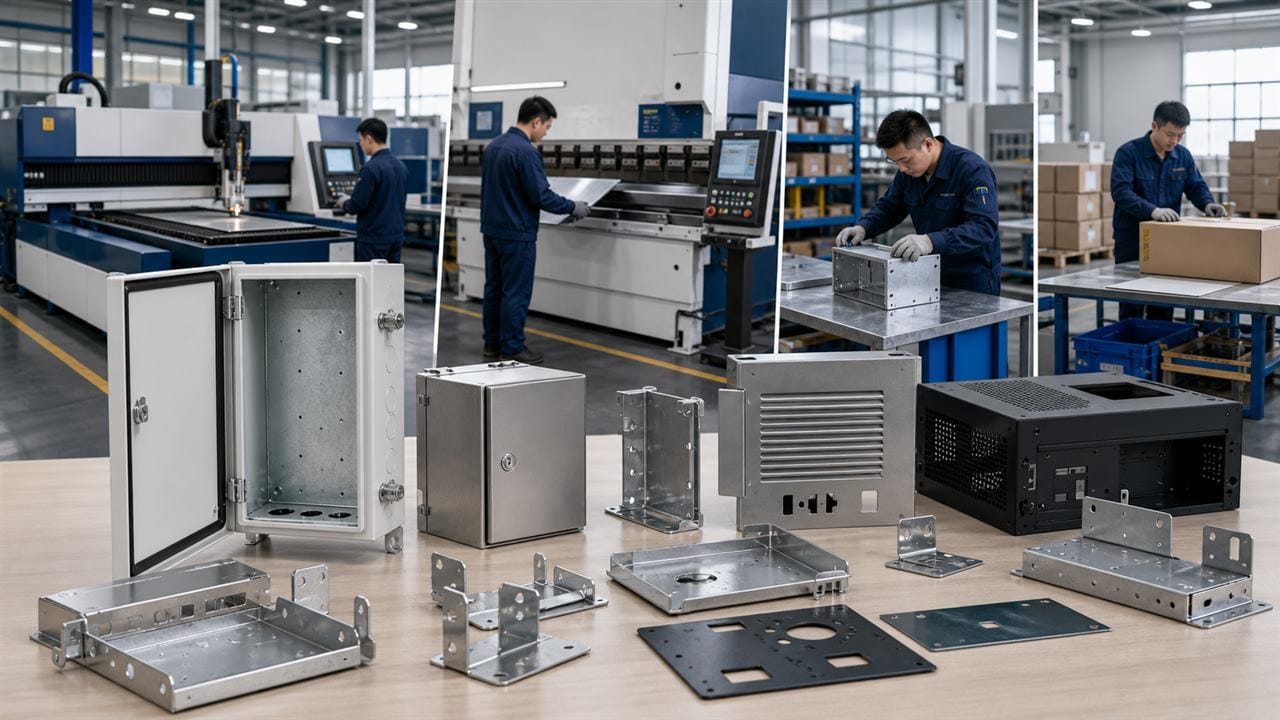
The sheet metal fabrication process is the workflow that turns flat metal sheets into real parts: enclosures, cabinets, brackets, guards, panels, covers, frames, chassis, and welded assemblies. It sounds like “cut, bend, weld.” Nice and tidy. Sadly, metal did not attend that meeting.
Real manufacturing has burrs, springback, welding distortion, coating thickness, revision mistakes, packing damage, and the occasional mystery hole that somehow moved 3 mm during procurement. This guide walks through each step so engineering and purchasing teams can send better RFQs, compare quotes fairly, and avoid paying later for problems that should have been caught earlier.
The Short Version of the Process
A typical project moves through these stages:
- RFQ and drawing review
- Manufacturability review
- Material selection
- Laser cutting or punching
- Deburring and edge treatment
- CNC bending
- Welding or hardware assembly
- Grinding and surface preparation
- Powder coating, plating, brushing, or other finishing
- First article or prototype approval
- Batch production
- Quality inspection
- Packaging and shipment
The order can change depending on the part, but the principle is the same: every step should protect the next step. If the drawing is unclear, cutting becomes guesswork. If bend design is poor, assembly becomes a wrestling match. If packaging is weak, the buyer receives a beautiful part with a fresh dent. Congratulations, now it is a complaint sample.
Step 1: RFQ and Drawing Review
The process begins before any machine starts. A good RFQ package gives the supplier enough information to quote the real part instead of quoting a guess wearing safety shoes.
- 3D STEP file for geometry and assembly understanding.
- 2D PDF drawing for material, thickness, tolerances, finish, welding notes, and critical dimensions.
- DXF or DWG files if flat cutting profiles are available.
- Quantity, prototype quantity, and expected batch demand.
- Surface finish, powder coating color, gloss, texture, or RAL code.
- Hardware, assembly, inspection, packing, and shipping requirements.
A STEP file shows the shape. A PDF drawing defines the rules. Both matter. If your team wants a refresher on drawing notes, this guide on how to read sheet metal drawings is a useful starting point.
Step 2: Manufacturability Review
This is where a good supplier earns trust. The review checks whether the part can be made consistently, not just whether it looks possible on a screen.
- Are holes too close to bend lines?
- Is the bend radius realistic for the material and thickness?
- Will welding distort the frame or door opening?
- Will powder coating block threads, grounding areas, or tight holes?
- Are visible surfaces protected through production and packing?
- Can the approved sample be repeated in batch production?
A design issue found here is a drawing update. A design issue found after coating is rework with a calendar problem attached.
Step 3: Material Selection
Material affects strength, corrosion resistance, weight, bending behavior, welding quality, finishing, and cost. There is no magic metal that wins every category. If a supplier says there is, check whether they also sell magic beans.
| Material | Common Use | Buyer Risk to Check |
| Cold-rolled steel | Indoor cabinets, panels, brackets | Needs finish protection for corrosion control. |
| Galvanized steel | Outdoor or corrosion-aware parts | Cut edges and welded zones still need review. |
| Stainless steel 304/316 | Premium, washdown, medical, food-adjacent, fertilizer-adjacent parts | Weld cleanup and surface class must be defined. |
| Aluminum 5052/6061 | Lightweight panels, covers, brackets, housings | Bend radius, scratch protection, and finish need care. |
For OEM projects where material choice affects repeat supply, this broader guide to OEM sheet metal fabrication explains how drawings, confidentiality, repeatability, and supplier discipline fit together.
Step 4: Cutting
Cutting turns flat sheet into the starting shape. For custom parts, CNC laser cutting is often used for outer profiles, holes, slots, ventilation openings, display cutouts, door panels, mounting plates, and bracket blanks.
Cutting accuracy matters, but it does not rescue poor downstream planning. A laser can cut the shape. It cannot decide whether a hole will deform during bending or whether a slot will fill with coating later.
When the project includes precision cut panels, review our laser cutting services page for capability context.
Step 5: Deburring and Edge Treatment
Deburring removes sharp edges after cutting. It sounds boring until a sharp burr cuts a hand, damages a cable, scratches a powder-coated panel, tears packaging, or makes the customer wonder who let the part leave the factory.
Buyer risk: cheap quotes may hide this step. Ask whether deburring, corner rounding, edge smoothing, and visible-surface protection are included.
Step 6: CNC Bending
Bending forms flat blanks into brackets, channels, covers, panels, boxes, and enclosure structures. This step controls fit, hole alignment, door gaps, assembly accuracy, and visual quality.
- Hole-to-bend clearance must be reviewed.
- Bend radius must match material and thickness.
- Springback needs process control.
- The bend sequence should be possible before the part becomes a metal puzzle.
Good bending looks boring. That is why engineers like it. For formed panels and tight tolerance work, see our sheet metal bending capability page.
Step 7: Welding and Assembly
Welding joins parts into enclosures, frames, guards, brackets, hoppers, chassis, and structural assemblies. Welding creates strength, but it also creates heat. Heat moves metal. Physics is annoying like that.
Buyer risk: without fixture control and weld sequence planning, welded parts can twist, panels can warp, holes can move, and doors can start acting like they have personal opinions.
For welded cabinets, racks, brackets, and enclosure bodies, our welding services page shows the type of assemblies MSTFAB supports.
Step 8: Surface Preparation and Finishing
Before finishing, parts may need weld grinding, cleaning, oil removal, rust removal, spatter cleanup, brushing, or pretreatment. Coating over dirt or poor weld cleanup is not finishing. It is hiding a problem until the buyer discovers it.
Finishing may include powder coating, wet painting, galvanizing, zinc plating, passivation, brushing, polishing, or anodizing. The drawing should define color, gloss, texture, coating thickness, masking areas, and visible surface class where needed.
Buyer risk: “black paint” is not a finish specification. It is a conversation starter.
Step 9: Prototype or First Article Approval
For parts that affect fit, appearance, sealing, mounting, or assembly, a prototype or first article is a smart checkpoint. It confirms dimensions, holes, bends, welds, hardware, surface finish, and packaging before the larger order begins.
A sample is not the finish line. The goal is repeatability. The 200th part should match the approved sample without heroic manual correction. Heroic manual correction is exciting; production prefers boring.
Step 10: Batch Production
Once the sample is approved, the process shifts from “can we make it?” to “can we make it the same way again?” This is where revision control, tooling notes, inspection points, surface protection, and packing standards matter.
Buyer risk: approving one sample but failing to lock the drawing revision can create a batch built to yesterday’s idea. Yesterday’s idea may be lovely. It may also not fit today’s product.
Step 11: Quality Inspection
Inspection checks whether the part matches the drawing and agreed requirements. Common checks include material, thickness, hole position, slot size, bend angle, flatness, weld quality, hardware location, finish, scratches, assembly fit, and packaging condition.
For enclosures, inspection may also include door gaps, hinge alignment, lock position, gasket contact, cable entries, mounting plates, ventilation openings, and visible surface quality.
Inspection should happen before shipment, not after your assembly team becomes the final quality department.
Step 12: Packaging and Shipment
Packaging is not the cardboard part of the job. It is the final quality process. Sheet metal parts can be heavy, sharp, powder coated, brushed, irregular, or easy to scratch. A perfect part that arrives dented is no longer perfect.
Good export packaging protects corners, surfaces, hardware, labels, and mixed assemblies. For projects that include final assembly and buyer-ready packing, review our assembly and export packaging support.
How the Process Changes for Enclosures
Enclosures require extra control because they include doors, hinges, locks, gaskets, grounding points, cable entries, ventilation, internal mounting plates, and visible surfaces. A box is easy to draw. A box that seals, opens, closes, looks clean, and survives shipping is manufacturing.
If your project is enclosure-heavy, this sheet metal enclosure factory guide explains why factory assembly, final QC, and export packaging affect the real buying decision.
A Buyer-Friendly RFQ Checklist
| Send This | Why It Helps |
| STEP file | Shows the 3D part shape and assembly relationship. |
| PDF drawing | Defines material, tolerance, finish, hardware, and critical dimensions. |
| Quantity | Helps quote prototype, pilot, and batch production properly. |
| Finish notes | Prevents coating, masking, color, and appearance misunderstandings. |
| Inspection points | Tells the supplier what must be verified before shipment. |
| Packaging requirements | Protects parts during export transit and warehouse handling. |
Final Thought
A strong sheet metal fabrication process is not only about machines. It is about review, sequencing, communication, repeatability, inspection, and protecting the part until it reaches your assembly line.
The best time to fix a fabrication risk is before production. The second-best time is not after 500 powder-coated parts arrive in the wrong color, but that is when many buyers learn the lesson.
Send clear drawings, define the real requirements, and choose a supplier that talks about the whole process, not just the unit price.
Related RFQ resource: When you are ready to turn process planning into pricing, review our sheet metal fabrication quote checklist for OEM buyers before sending drawings to a factory.
FAQ
What is the sheet metal fabrication process?
It is the workflow used to turn flat metal sheets into finished parts through drawing review, material selection, cutting, deburring, bending, welding, finishing, inspection, packaging, and shipment.
What is the first step?
The first step is RFQ and drawing review. A supplier needs the STEP file, PDF drawing, material, thickness, quantity, finish, tolerance, welding, hardware, inspection, and packaging requirements.
Why is manufacturability review important?
It catches risks such as bad bend design, hole deformation, welding distortion, coating thickness problems, unclear tolerances, and packaging risks before metal is cut.
Should I approve a prototype before batch production?
For parts that affect fit, appearance, sealing, mounting, or assembly, yes. A prototype or first article helps confirm the process before larger production begins.
MSTFAB provides TIG and MIG sheet metal welding services for structural assemblies, cabinets, frames and OEM metal components.
 WeChat Contact
 WhatsApp Me Directly