
The Short Answer
Specify the brushed finish as an assembly requirement, not only a surface name. Mark visible faces, grain direction, weld-blending limits, cleaning expectations and scratch acceptance on the drawing. Approve a finish reference before the batch and agree how the finished enclosure will be protected. A brushed appearance does not establish corrosion resistance, cleanability or an enclosure rating.
This guide focuses on cosmetic and functional handoff checks for empty brushed stainless enclosure shells. Use MSTFAB’s brushed stainless steel fabrication service for the broader manufacturing scope, rather than treating the article as a universal finish specification.
Finish reference
Define grain direction across the assembled enclosure

Doors, front panels, control faces and removable covers should be reviewed together. A panel can meet its individual dimensions but look mismatched when its grain runs in a different direction from adjacent parts.
- Visible-face map: mark the surfaces that need the agreed cosmetic standard.
- Grain arrows: define orientation on each panel and how it should read after assembly.
- Reference: approve a sample or agreed finish reference under a stated inspection method.
Do not use a finish name or polishing-grit number as the entire acceptance plan. If roughness is a functional requirement, specify its measurement and acceptance separately from the visual sample.
Surface protection
Control scratches through cutting, bending and assembly

Plan handling protection before the first operation. Bending tools, worktables, stacked parts and repeated assembly can mark a visible surface that was acceptable when the sheet arrived.
- Process protection: confirm which protective film is compatible with each operation and when it must be removed.
- Tool and support contact: review where the finished faces touch tooling, fixtures and other parts.
- Assembly route: define separation, handling and a final visible-face check before packing.
Film is not automatically suitable for every cutting, welding or finishing operation. Agree the process-specific protection plan, rather than promising that one film stays intact throughout production.
Related forming review: sheet metal bending and enclosure assembly.
Welded details
Approve weld blending without losing the finish reference
Decide which seams will remain visible before the shell is fabricated. Heat marks, grinding patterns, local thinning and a change in grain texture can make a repaired corner stand out from the rest of the enclosure.
- Identify visible welds, corners and the allowed blending zones.
- Review the joining sequence and any distortion risk before finishing.
- Compare blended areas with the approved reference; do not assume every weld can become invisible.
- Confirm any cleaning, pickling or passivation requirement as a separate operation.
For process discussion, see the existing TIG welding service. Agree the actual scope and acceptance for the drawing rather than inferring it from a process name.
Material and environment
Choose the stainless grade separately from the brushed look
Brushing describes a surface treatment, not the alloy or suitability for every environment. Review cleaning chemicals, chloride exposure, temperature, drainage and maintenance before selecting the grade.
Compare the 304 stainless enclosure selection guide and the 316 stainless enclosure guide for their material-specific questions. Neither grade is a blanket guarantee against corrosion.
If a color-controlled coated finish is acceptable, compare the powder-coated enclosure quality guide. The substrate, preparation, finish and expected maintenance need to be considered together.
Functional acceptance
Check door fit and cleaning needs as well as appearance
A cosmetic approval does not replace the mechanical inspection. Check door flatness, hinge position, latch alignment, mounting holes, gasket interfaces and mating parts against the approved drawing.
State the intended cleaning method and any finish or residue requirements. An attractive brushed surface is not evidence of medical, food-contact or hygiene compliance. Confirm any application-specific validation with the equipment owner.
Related applications include medical equipment shells and instrument enclosures. For the wider metalwork scope, see stainless sheet metal enclosure fabrication.
Shipping protection
Release the finish and the packing plan together
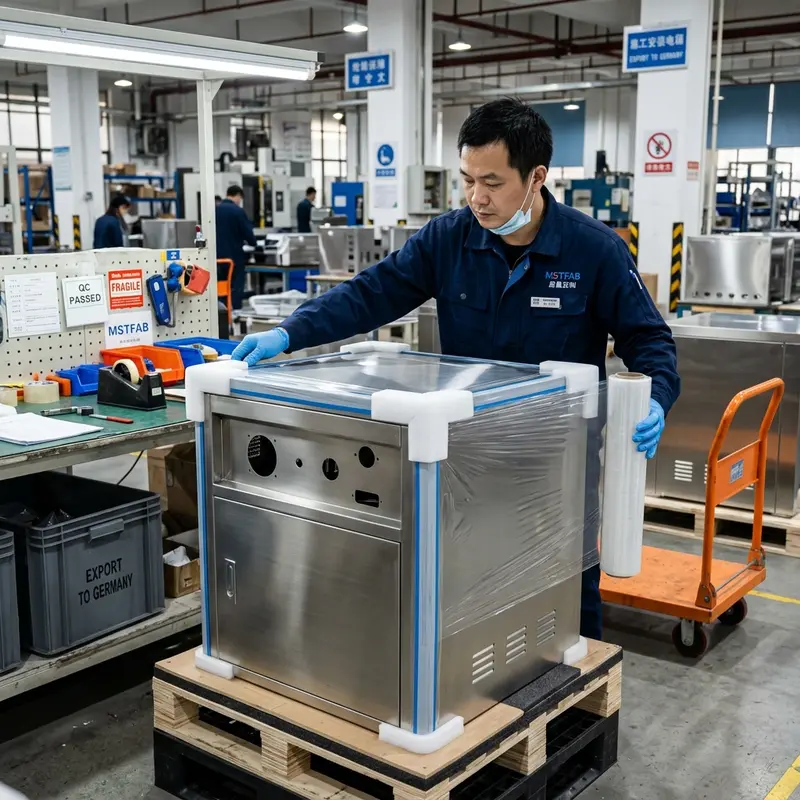
Define protection for the actual shipping and storage route. Packing should separate finished faces and support the enclosure so that straps, hardware or neighboring parts do not rub against them.
- Before wrapping: confirm the agreed surface cleaning and inspection.
- Contact points: identify separators, edge protection and support locations.
- After packing: agree accessory containment, packing photos and any receiving checks.
Specify suitable film, foam, cartons or crating for the order. Do not treat one packaging method as a guarantee that damage cannot occur in transit.
Buyer control matrix
Agree the evidence before production release
Convert these points into order-specific acceptance criteria. This is a purchasing checklist, not a statement that a particular test, certificate or record is automatically included.
| Control point | Confirm for your order |
|---|---|
| Visible faces and grain | Approved face map, grain arrows and finish reference used for the assembly. |
| Welded and blended areas | Defined seams, blending limits and comparison against the accepted sample. |
| Functional geometry | Drawing-based door, latch, flange, mounting-hole and trial-fit checks. |
| Cleaning and protection | Agreed final cleaning, protection materials and packing acceptance. |
| Repeat orders | Controlled reference sample and drawing revision; agreed method for comparing later batches. |
RFQ checklist
Send the drawing and acceptance package together
- Matching STEP model and PDF drawing revision
- Stainless grade and sheet thickness
- Visible-face map and grain-direction arrows
- Finish sample or appearance reference
- Roughness requirement and method, if applicable
- Weld and blending acceptance
- Door, hardware and mating-part requirements
- Cleaning method and installation exposure
- Prototype and production quantities
- Scratch acceptance and sample approval
- Protective film and packing requirements
- Destination and required delivery timing
Request drawing review for your empty enclosure shell through custom sheet metal enclosure design and fabrication. The broader sheet metal enclosure service covers manufacturing scope; any finish test, certification or equipment-level validation must be agreed separately.
Request a drawing-based enclosure review
Send the model, drawing, quantity and acceptance requirements for your empty sheet metal enclosure shell.
Send Drawings for a QuoteTechnical reference: Outokumpu surface-finishes guidance explains why abrasive grit and resulting roughness do not have a single fixed relationship. Use the actual material, finish reference and measurement requirement for the order.
 WeChat Contact
 WhatsApp Me Directly